
Congo Bongo HS Kit
3-boardset Installation Guide
Step 0: Turn off power to the game
While it may be possible to install
this kit without removing your board from its cabinet, you may find it easier
to install the kit if you do remove the board. In that case, pay careful
attention (or label), any wire connections as you disconnect your board so that
you can correctly rehookup the game PCB afterwards. Take note of which side of
the PCB edge connector is facing the parts side of the board and which side
faces the solder side, This connector is typically not keyed and can be
inadvertantly plugged in backwards - ouch! It is recommended that you label the
connector faces with something like "parts side" or "solder side".
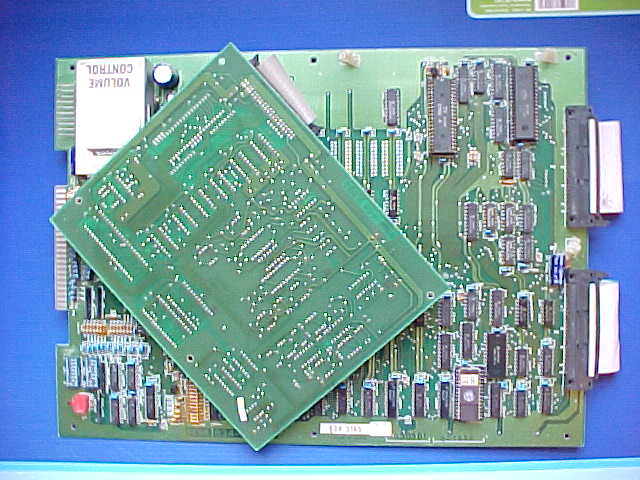
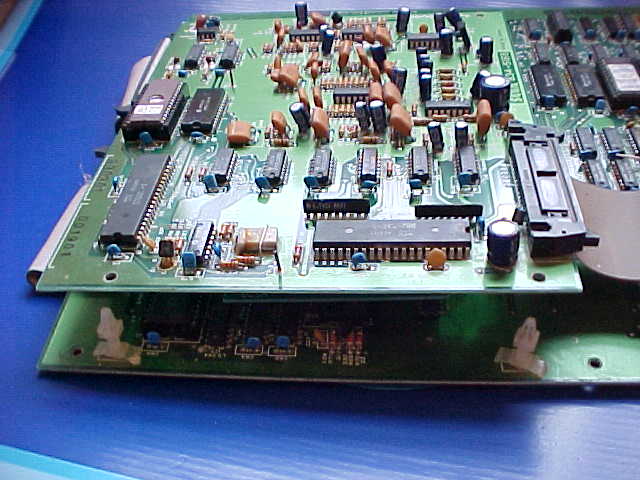
Step 1a: Locate the CPU/Controller board
This boardset consists of three
boards (video, CPU/conroller, and sound). The CPU/Controller board is the larger
pcb which is between the video and sound pcbs. It has 834-5166 on the
PCB. It is the board with the edge connector for the main harness.
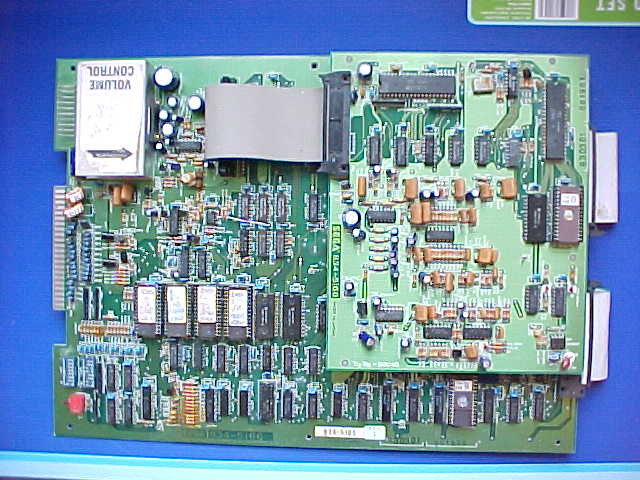
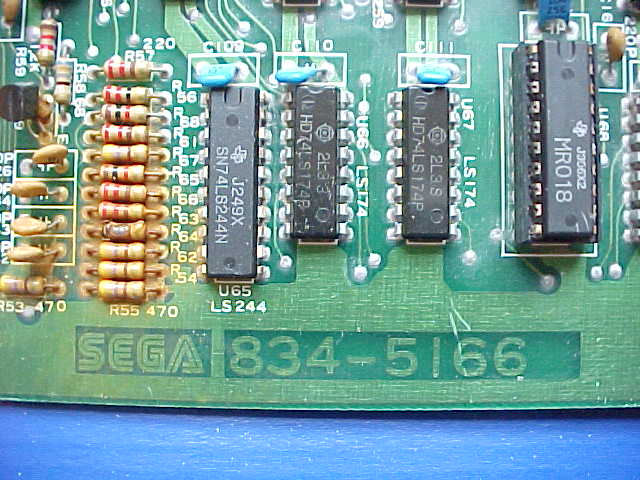
Congo Bongo CPU/Controller board (834-5166)
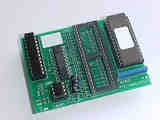
Step 1b: Locate the Sound board
The sound board is the smaller board on
the top of the boardset. It has 834-5168 on it, and is also labelled
"Tip Top - SOUND". It has a single gray ribbon cable connected to it and
is attached with 4 or 5 plastic standoffs.
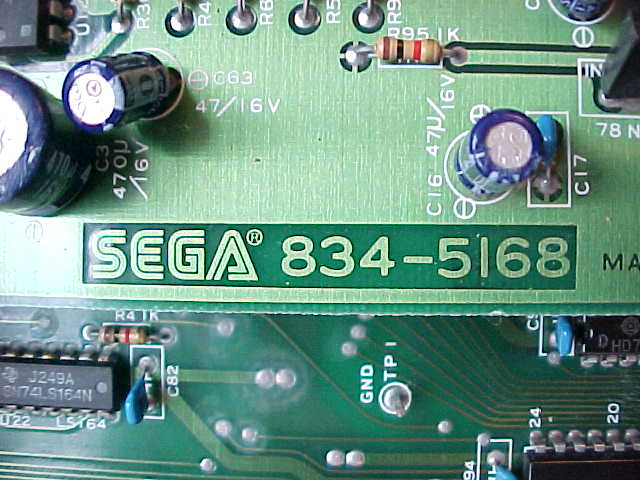
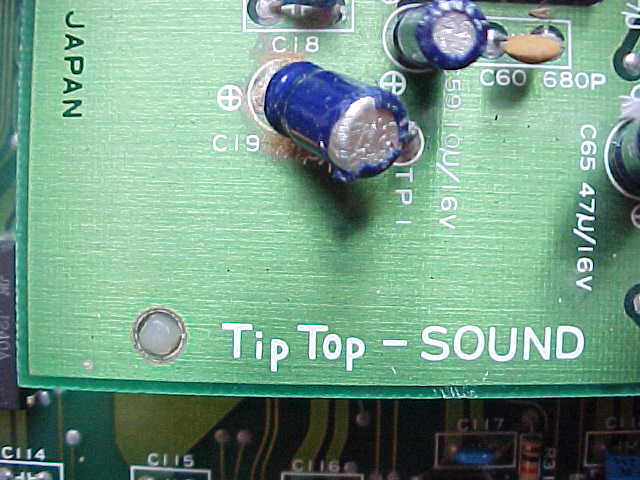
Congo Bongo Sound Boards (834-5168)
The sound board will need to be temporarily removed in order to expose the
CPU Z80 processor such that the HS kit can be installed.
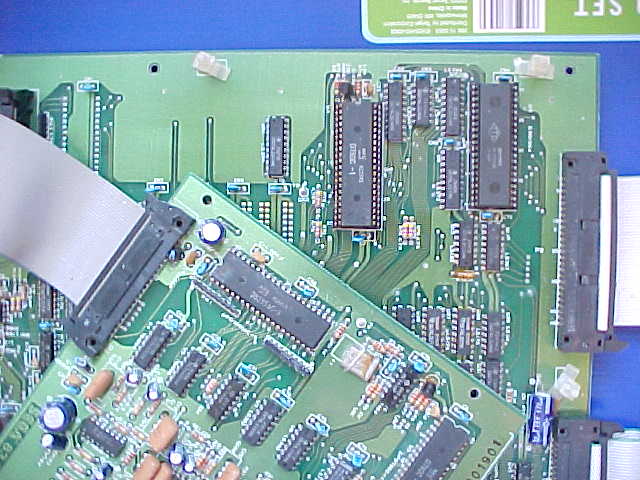
Congo Bongo Sound temporarily removed
exposing Z80
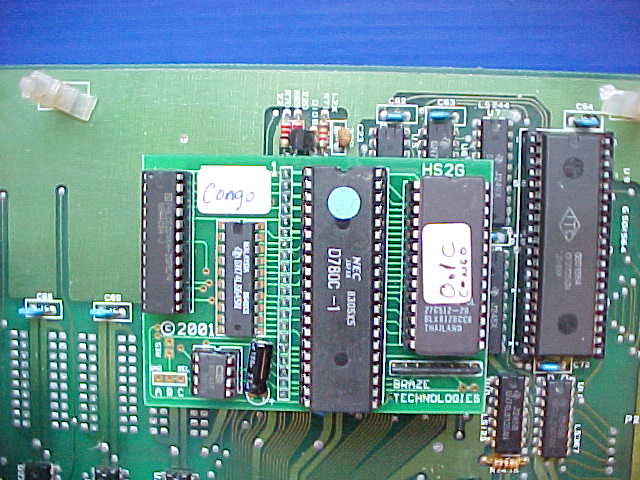
Step 2: Remove the Z80-CPU chip
Locate and remove the Z80 chip on the CPU board. Use the above photos to assist
in locating it. See Z80
Chip Identification for additional information. The Z80-CPU chip is a 40 pin
(large) chip, located at U4 Do not get this chip confused with the other
40 pin chip nearby. Remove the chip gently by using a flat head screwdriver to
pry it out of its socket from each end. Be careful not to bend any of the pins.
If any pins do get inadvertantly bent, you will need to straighten them out
before the next step. Needle nose pliers work the best for this.

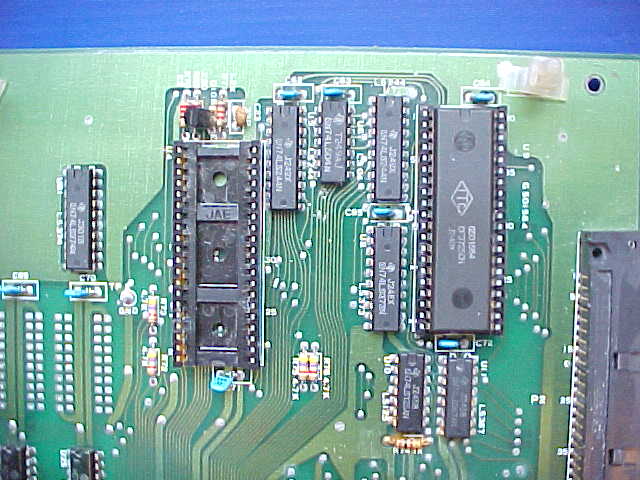
Congo Bongo Z80-CPU location
Step 3: Insert the Z80-CPU into the daughter card
Insert the just
removed Z80-CPU chip into the empty 40 pin socket on the High Score Save Kit.
Make sure pin-1 is correctly oriented. Pin-1 is marked on the Z80-CPU chip
usually by some type of indentation or circle molded into the plastic. The end
of the chip with the marking, needs to match up with the socket on the daughter
card that also has a marking on the plastic. Pin-1 is also labelled on the kit
pcb with a "1".
Pin-1 Identification
Click images for a larger view |
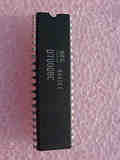
Z80 CPU Chip |
High Score Daughter Card |
Pin-1 Identification |
|
Step 5a: Insert the daughter card into the CPU board
Insert the daughter
card back into the Z80-CPU socket on the CPU board where the Z80-CPU chip was
originally removed from. Again, make sure pin-1 of the Z80/daughter card is
oriented to correctly match pin-1 on the CPU board. Use the photos as a guide.
The header on the daughter board has pins that are more heavy duty than the
original Z80-CPU pins, thus you will need to press very firmly to get the
daughter card to be fully inserted into the original Z80-CPU socket.
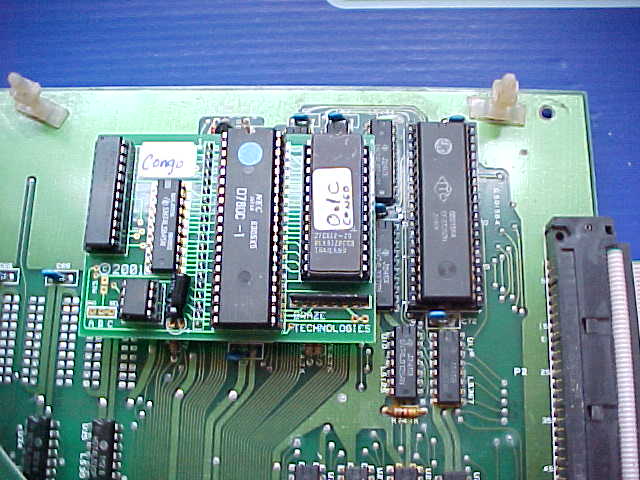
Congo Bongo with HS kit installed
Step 5b: Secure the sound board to the CPU board
Unfornately once the HS
kit is installed, there is not enough clearance between the sound board and the
CPU board to use the same standoffs as before. You will need to figure out
another way to securely attach the sound board to the cpu board. Possibly by
using longer plastic standoffs or attaching the board in a different way such
that it is not likeky to move around too much or cause any electrical shorts
between them.
Not enough clearance to reuse the same standoffs
Step 6: Double check your work
Review the steps and double check that
Z80-CPU is properly installed into the daughter card with no bent pins and that
it is correctly oriented for pin-1. And that the daughter card is also
installed snug into the Z80-CPU socket at U4 with pin-1 matched up.
Step 7: Powerup and game and enjoy!
Reinstall your board into the
cabinet if necessary, and then powerup your game.
If the game does not come up, turn power off immediately, double check your
work, and read over the trouble
shooting section.
Step 8: Optionally remove the four CPU code eproms
The four CPU code
eproms are not needed once this kit is installed because all of the software is
contained on the single eprom as part of the kit. These four code eproms can be
removed and used for other purposes. As well it saves a tiny amount of power and
heat. This an an optional step and can be skipped.

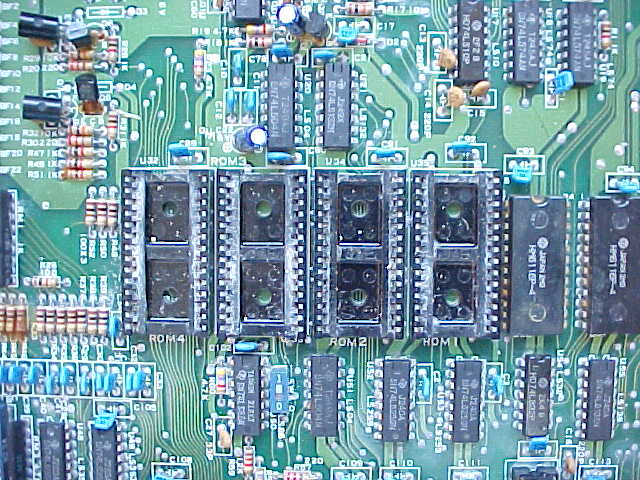
Congo Bongo CPU eproms can optionally
be removed.
< Prev Page
|


